“Wood” You like to Know How to Create Your Own Wood Feature Wall? Here's the DIY Guide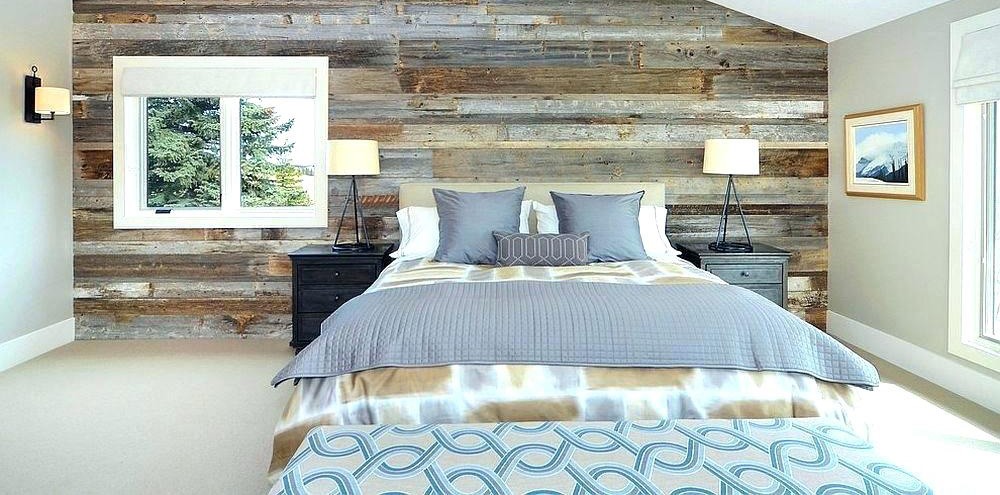
Wood paneling adds earth tone colors to the wall and an atmosphere of natural warmth to the room. Creating your own DIY wood wall is a fun, low-cost project to enhance your interior's aesthetic. You don't need to be a master carpenter to make a beautiful feature wood wall - all you need is your DIYer toolbox and some shipping pallets! This project is a great way to enhance your knowledge and skills working with upcycled materials.
This article provides easy step-by-step instructions to build a DIY wood wall for your home's interior.
Easy DIY Wood Wall Guide
You can build a DIY wood wall using upcycled wood pallets, and the finished pallet panels install onto your wall. You could also use the many other flooring options available at Floors Now.
What You Will Need
First and foremost, you will need wood flooring or pallets. Since the pallet wood is your display material, look for pallets that are in good shape. Avoid ones with rot or structural damage.
A good place to get cheap pallets is a local habitat for humanity restore or distribution center. Determine how many pallets you need by measuring the piece of wall you want to use. A standard pallet has six to eight 1-inch-by-4-inch planks on each side, measuring 50-inches long.
Pallet Equation
Find the total area of your feature wall. Multiply the length by the width.
Multiply the total linear feet by 0.3, which is the width of a plank. Divide the total area by the area of a plank to find your answer.
Warning on Pallet Type
Every shipping pallet features a mark that identifies it as, either heat-treated or chemically treated. Only use heat-treated (HT) pallets. Chemically treated (MB) pallets are not safe for indoor use. MB pallets are for shipping harmful chemicals and toxins, which can contaminate the pallet wood and breed bacteria. Breathing in the sawdust of MB treated pallets is toxic, which makes it dangerous to sand MB pallet wood. So, only use HT pallets for your DIY wood wall.
DIY Wood Wall: Step-by-Step Building Guide
Other than the pallet material, you need all of your standard DIYer tools. Most pallets use soft wood, such as cedar, pine, and spruce. Pallets that are shipped from foreign countries use different timber. If you find pallets of scrap hardwood, like oak, cherry, or walnut, you will need strong cutting tools.
Be sure you have a strong hammer, crowbar, reciprocating saw, circle saw, and nailgun. You will also need the basics, like gloves, a mask, tape measure, etc. And, if you are using hardwood, be sure to have a corded drill and impact driver.
1. Strip the Planks
You have to get the planks off the pallet frame without busting the wood. With your reciprocating saw and metal cutting blade, carefully cut the outer planks away from the inner frame. Make sure you are using gloves and goggles.
Your blade cuts through the nails holding the planks to the frame. Start at the top and work your way down each side. If you are working alone, anchor the pallet upright for added stability, by attaching long two-by-fours from the top of the pallet to the ground.
2. Fit Planks to Size
If you are going for a more rustic, natural, unfinished wood wall, you can skip down to step number three. For a clean, modern DIY wood wall, make sure that all your planks fit together clean and flush. To do this, you need a planer, tape measure, square, and mitre saw.
To make your planks fit together uniformly, use a planer on the front, back, top, and bottom of each plank. Use your mitre or circular saw to shave off a blades width of the rough ends of each plank.
Size your display to account for the length of your planks. To ensure that seams do not sit on top of each other, each row should feature one shorter plank.
3. Sand, Stain, and Finish
Once you have your raw plank materials separated, it's time to make them look good. The amount of finishing your wood planks need before they are ready for display is up to you.
Start with 150-grit sandpaper and an orbital sander.
The more you sand, the more you expose the woods beautiful grain. For a rustic look, simply leave the sanded planks unfinished, or stain them all the same color. For a modern interior look, use a few different stains and paints.
You can leave the planks flat for a natural look, or add a polyurethane gloss finish for a modern aesthetic.
4. Attach Planks to the Wall
On the wall where your wood will be featured, find and mark the studs. Use one-by-three inch wood beams to span the length of the studs, from ceiling to floor. Use drywall screws to anchor the beam to the stud, about every two feet.
Start in the lower left-hand corner to attach your first pallet plank. Square the left edge of the plank with the bottom left edge of your anchor beams and attach it with your nailgun. Use a level on the plank before you attach the plank to the second anchor point.
The first row ends with a short plank, so the second row starts with a short plank. As long as the first plank on each row alternates short and long, your seams will alternate in uniform.
5. Cut Out Outlet Spots
Finally, measure and cut around your outlets. Use a jigsaw to cut into the planks and around the outlet's perimeter. You can cover up the rough edge with an outlet cover or plan ahead for these cuts before you finish your planks.
Final Thoughts
With a little elbow grease, your wood feature wall project can be done in less than 48 hours. And if you want to speed up the sanding process, enlist the help of some crafty friends. Most of all, have fun and be creative!
If you like this DIY wood wall project, share it with a friend through social media. Subscribe to our newsletter for more DIY budget projects!